Valve stem seals broken?
All valves run in valve guides that are shrunk into the cylinder head. To prevent expensive engine oil from constantly running out of the head into the combustion chamber, the valve stems are fitted with sealing rings at the top, or more precisely, shaft seals. When these inconspicuous penny parts are worn, lubricating juice runs (logically) through the shaft into the combustion chamber and produces a funny blue exhaust plume. Typically when downshifting / easing off the throttle.
So if your buddies always want to keep a mile apart on the MC Firefucker group ride or always want to ride in front, it’s worth replacing the valve stem seals.

Test the valve guide
But if the colleagues at the MC get asthma under the half-shell again just a few hundred kilometers after replacing the valve stem seals, this could also be due to faulty valve guides. These guideways are mostly shrink-fit, cylindrical non-ferrous or sintered metal guideways that can withstand at least half a billion cycles. Or at least should be able to.
If these valve guides are damaged, the valve, which is almost completely inserted, can be moved back and forth radially. For a test, clean the valve, rub the stem and guide dry and feel the play with your fingertips. Very slight wobbling is permitted, significant loosening means: guide is worn.
Logically, in this case even brand-new valve stem seals cannot stop the lubricating juice for long and the exhaust plume of the GPZ looks more like two-stroke-rocket with 1:25 in the tank even after the change.

Sucker wood
The valve must be turned when grinding in. This can be done by gripping the plate at the front or by gripping the valve stem where the springs were previously located. We use the patented suction cup – this allows you to elegantly grip and turn the valve disk. It also works without or with a converted hand mixer, or, or, or.
However, you have a lot of feeling with this part, even if it takes a little longer. Since quality is more important than time in this step, it is worth investing in such a miracle device.

Grinding paste
Valve grinding paste consists of corundum in plasticine. This bond is mineral and, if the paste hardens after a few decades in the tool cupboard, it can be diluted again with a splash of petroleum or thin oil in the direction of “caramelized honey”. Originally, this stuff was mainly used to grind in fittings in steam or hot water systems. Here, machine fitters lovingly took care of leaking valves or gate valves, so that this compound was available in at least 5 different grains.
Today, grit 00 (very fine), for example, is difficult to find; most specialist retailers only offer “coarse” and “fine”. However, this is sufficient for our purposes.
It’s easy to guess that the rough preparatory work is done with “coarse”, while the fine compound is used for the finishing touches and primarily to achieve a good surface.


Letzte Aktualisierung am 2024-04-03 / Affiliate Links / Bilder von der Amazon Product Advertising API
Grinding in the valve
To grind in, apply a thin layer of grinding paste to either the sealing surface of the valve or the valve seat. Now insert the selected new valve into the seat. Perhaps oil the shaft a little so that it slides better.
If you now turn the valve back and forth, you can clearly feel the crunching of the individual abrasive grains. Lift off the valve every few turns and turn a little further “in the air” so that you do not always grind in the same place.
When there is no more grinding, lift off the valve and press the grinding paste back into the grinding gap.


Valve tight again?
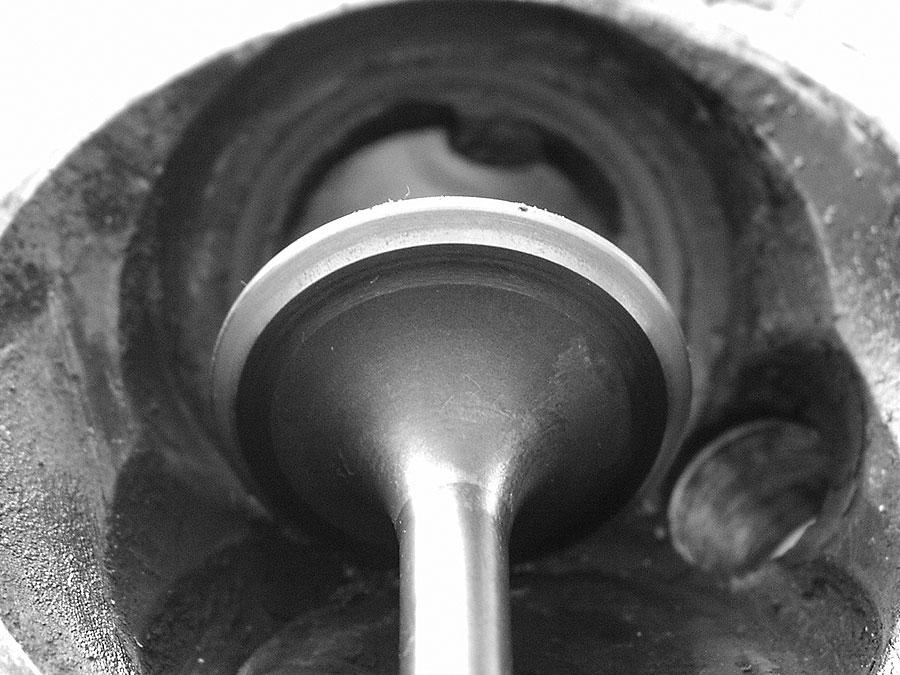
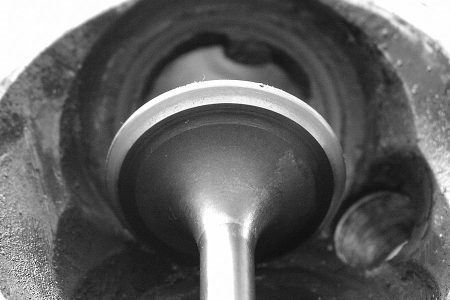
Depending on the chosen grinding paste, you can now throw an LP or a single onto the turntable and indulge in grinding. If the sealing surfaces on the seat and valve disk look like the picture, you are done.
The load-bearing surface should be uniformly matt and gray. Not too wide or too narrow. If it is too far out or in, this indicates a seat that needs to be re-milled. This area here is in the middle and is just right. If you want to be on the safe side, you can also check the tightness of the valve seat again:
To do this, turn the head so that the intake or exhaust opening of the respective valve points upwards, insert the valve into the head, press it firmly closed and pour a sip of gasoline or diesel into the head.
If you now look into the combustion chamber (close the valve firmly!) and it remains dry around the valve seat, you are finished with this seat. If a lot of fuel drips through, you have to rework it.


Assembly
When the seat is finished, all grinding paste must be removed from the valve and valve seat. The valve guide in particular requires clinical cleanliness: to remove even the last atom of this royal mass, a strip of cloth is pulled through the guide. Only fit the new valve stem seal NOW, otherwise corundum crumbs may hide in the groove of the seal. Simply place the new gasket on the valve stem guide: pop!
Before installing the new, ground-in valve, apply a dash of oil to the stem and distribute it well. To install the valve disk and the spring, press the spring together and insert the valve locks. Make sure that the valve retainers do not slip too deep and get stuck underneath the grooves.
It doesn’t matter whether you first remove all the valves, grind them in and reinsert them or whether you deal with each valve individually: the only important thing is that the ground-in valves are not interchanged. If in doubt, mark. Now you can screw the cylinder head back together by every trick in the book and complete the engine. Adjust valve clearance. Done.
Have you enjoyed your work so far? Yes, really? Then you don’t need to pay attention to the timing or the timing belt tension when completing the engine and can run to the mechanic and get a dozen more valves. If not: Attach a red label to the ignition key and double-check the timing.


Letzte Aktualisierung am 2024-04-05 / Affiliate Links / Bilder von der Amazon Product Advertising API